
Are you tired of struggling with sticky buttons on your gaming controller? Lots of gamers face this annoying problem when their buttons get dirty or sticky from spills or gunk buildup. But don’t worry! I will teach you the step-by-step process of how to clean sticky controller buttons without rubbing alcohol.
By following our instructions, you can restore your controller to optimal functionality and enjoy smooth gaming sessions once again.
Common Causes of Sticky Buttons:
- Spills: If you accidentally spill drinks like soda, coffee, or juice on your controller, the liquid can get into the buttons and make them stick.
- Dirt and Dust: Using your controller a lot can make dirt and dust collect around the buttons, which can also make them stick.
- Moisture: Being in humid or moist places, especially if the room isn’t well-ventilated, can also make your buttons sticky.
Tools and Materials Needed
Before starting the cleaning process, gather the necessary tools and materials. Here’s what you’ll need:
- Phillips Screwdriver: For disassembling the controller.
- Clean Rag: To wipe down and clean the interior components.
- Alternative Cleaning Solution: Instead of rubbing alcohol, you can use alternatives such as distilled water, mild soap solution, or electronic cleaning wipes.
Alternative Cleaning Solutions:
| Cleaning Solution | Description |
|---|---|
| Distilled Water | A gentle option for removing dirt and grime without the potential harshness of rubbing alcohol. |
| Mild Soap Solution | Dilute a small amount of mild dish soap in water for a safe and effective cleaning solution. |
| Electronic Cleaning Wipes | Pre-moistened wipes specifically designed for cleaning electronic devices and components. |
Choose the cleaning solution that best suits your preferences and availability.
Disassembling the Controller
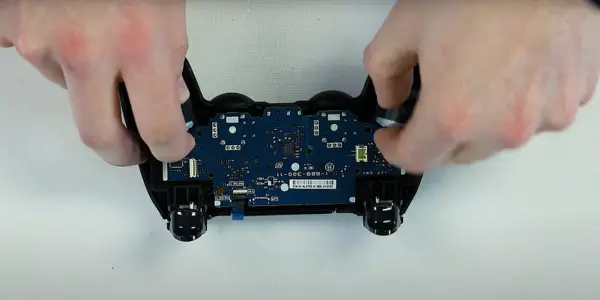
To begin cleaning your sticky controller buttons, you’ll need to disassemble the controller. Follow these steps:
- Remove Screws: Use a Phillips screwdriver to remove the screws from the back of the controller. Keep track of the screws to ensure they are not misplaced.
- Separate Components: Carefully separate the controller’s components, taking note of the model number for specific instructions.
- Detach Connectors: Gently detach ribbon cables and other connectors to avoid damage. Take your time to avoid any accidental damage to the internal components.
Tips for Disassembly:
- Organize Screws: Place screws in a small container or magnetic tray to prevent them from rolling away or getting lost.
- Document Disassembly: Take photos or notes during disassembly to ensure you can reassemble the controller correctly later.
- Handle with Care: Avoid applying excessive force when detaching connectors to prevent damage to delicate components.
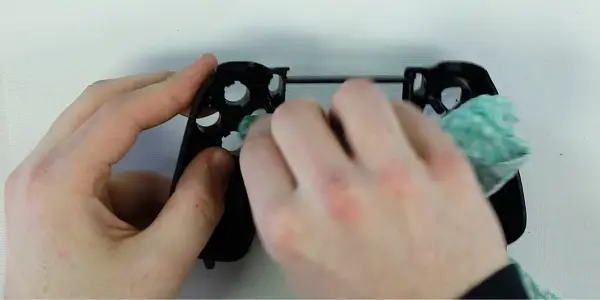
- Clean Interior: Use a clean rag or electronic cleaning wipes to gently wipe down the interior of the controller, removing any visible dirt or residue. Pay close attention to areas around the buttons where sticky buildup is likely to occur.
Removing Stubborn Residue:
- Q-tip Method: Dampen a Q-tip with your chosen cleaning solution and carefully swab around the edges of sticky buttons to loosen and remove stubborn residue.
- Soft Brush: Use a soft-bristled brush to gently dislodge dirt and grime from hard-to-reach areas without damaging sensitive components.
Clean Sticky Controller Buttons:
Once the controller is disassembled and the interior is clean, it’s time to focus on cleaning the sticky buttons themselves. Follow these steps:
- Button Removal: Carefully remove the sticky buttons from the controller’s faceplate, taking note of their positions for reassembly.
- Cleaning Solution: Apply a small amount of your chosen cleaning solution to a clean rag or cotton swab.
- Wipe Buttons: Gently wipe down each button with the dampened rag or swab, focusing on areas where stickiness is most prevalent.
- Thorough Cleaning: Pay special attention to the edges and crevices of the buttons, where dirt and residue tend to accumulate.
- Allow to Dry: After cleaning, allow the buttons to air dry completely before reassembling the controller.
Alternative Cleaning Methods:
- Soaking Method: For particularly stubborn residue, you can soak the buttons in a mild soap solution for a few minutes before gently scrubbing them clean.
- Ultrasonic Cleaner: If available, an ultrasonic cleaner can provide a thorough and efficient cleaning of sticky buttons by using high-frequency sound waves to agitate dirt and grime.
Reassembling the Controller
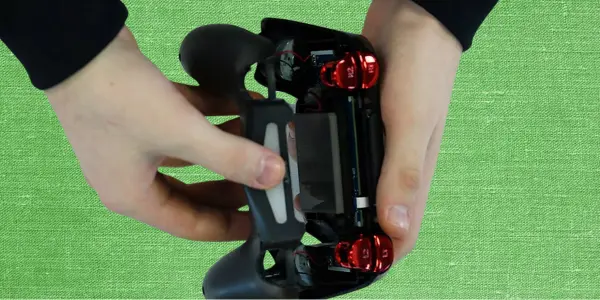
After cleaning the controller components, it’s time to put everything back together. Follow these steps:
- Reconnect ribbon cables and other connectors in their respective positions.
- Align the controller’s components carefully to ensure they fit snugly together.
- Secure the screws back into place using the Phillips screwdriver.
- Double-check that all components are properly aligned and tightened to avoid any issues.
- Testing the Controller
Before declaring the cleaning process complete, test the controller to make sure that the sticky buttons issue has been resolved. Here’s how to test your controller:
- Power On: Reconnect the controller to your gaming console and power it on to initiate the testing process.
- Button Functionality: Test each button on the controller to determine if they are functioning correctly. Pay close attention to the previously sticky buttons to see if they respond smoothly.
- Check Responsiveness: Press each button multiple times to confirm that they are responsive and free from stickiness or resistance.
- Test All Functions: Test other functions of the controller, including analog sticks, triggers, and directional pads, to ensure they are also operating as expected.
Troubleshooting Tips:
- Button Calibration: If certain buttons are still not responding correctly, you may need to recalibrate the controller or adjust button settings in your gaming console’s menu.
- Repeat Cleaning Steps: If stickiness persists after testing, you may need to repeat the cleaning process to ensure all residue has been removed.
💡 Maintenance Tips
To prevent sticky buttons from recurring in the future, consider implementing these maintenance tips:
- Regular Cleaning: Make it a habit to clean your controller regularly, especially after intense gaming sessions or if spills occur.
- Avoid Eating and Drinking: Refrain from eating or drinking while gaming to minimize the risk of spills or food debris getting into the controller.
- Store Properly: When not in use, store your controller in a clean, dry environment away from potential hazards.
- Use Protective Covers: Consider using protective covers or skins for your controller to shield it from spills and dirt buildup.
- Keep Hands Clean: Wash your hands before gaming to reduce the transfer of oils and dirt onto the controller’s buttons and surfaces.
Conclusion
Cleaning sticky controller buttons without rubbing alcohol is something you can do with the right tools and tricks. Just follow the steps in this guide and take good care of your controller to keep it working well. Be careful and patient when cleaning, and ask for help if you need it. With a bit of effort, you can get rid of sticky buttons and enjoy playing games smoothly again.