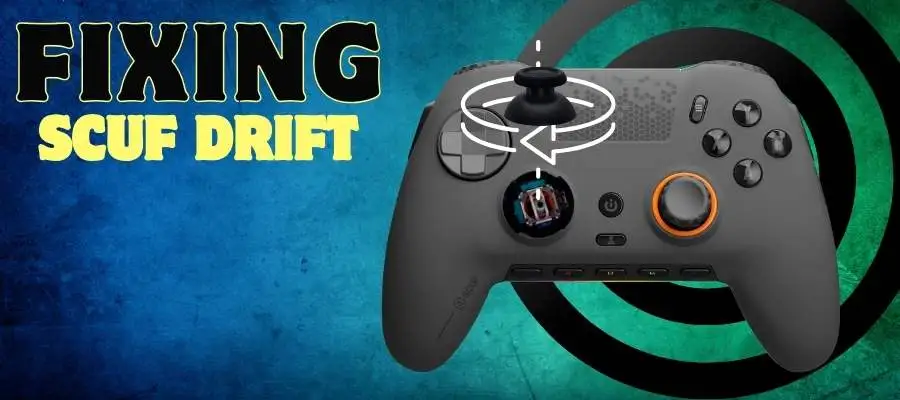
Stick drift can ruin your gaming experience, causing your character to move in unintended directions, which is frustrating and disruptive.
This problem, known as stick drift, often effect Scuf and valve index controllers, which are popular among gamers for their customizability and performance. Fixing stick drift is essential for maintaining optimal control and enjoying your games to the fullest.
In this article, we’ll walk you through everything you need to know about fixing the scuf stick drift. We’ll cover the causes of stick drift, the materials you’ll need for the fix, and provide a detailed step-by-step guide. Let’s jump in and get your controller back in action.
📌Causes of Stick Drift
Several factors can cause stick drift in your Scuf controller. Understanding these causes can help you prevent the issue in the future and ensure your controller remains in good working condition.
Dust and Debris Buildup
One of the most common causes of stick drift is the accumulation of dust and debris inside the controller. Over time, tiny particles of dust, dirt, and pet hair can get into the analog stick mechanisms, interfering with their movement and causing drift. Regular cleaning can help prevent this buildup and maintain smooth operation.
Even a cat that sheds a lot, especially if you often play on the couch where your cat likes to sit. These hairs can get lodged in the analog stick mechanism, causing stick drift.
Wear and Tear on Internal Components
Controllers undergo a lot of stress during regular use, especially in intense gaming sessions. The constant movement and pressure on the analog sticks can cause wear and tear on the internal components.
This wear can affect the stick’s calibration and lead to drift. While high-quality controllers like Scuf are designed to be durable, they are not immune to the effects of prolonged use.
Software Glitches or Firmware Issues
In some cases, stick drift might be caused by software glitches or firmware issues. These problems can affect the controller’s calibration and responsiveness.
Updating your controller’s firmware and ensuring your gaming console or PC is running the latest software can help mitigate these issues.
Environmental Factors
Environmental factors, such as humidity and temperature, can also affect the performance of your controller.
High humidity can cause moisture buildup inside the controller, which might lead to stick drift. Similarly, extreme temperatures can affect the internal components and their responsiveness.
User Habits
How you use and store your controller can also contribute to stick drift. Rough handling, dropping the controller, or storing it in dusty or damp environments can accelerate wear and tear or introduce debris into the analog stick mechanism.
📌How to Fix Scuf Stick Drift Step-by-Step

Materials Needed
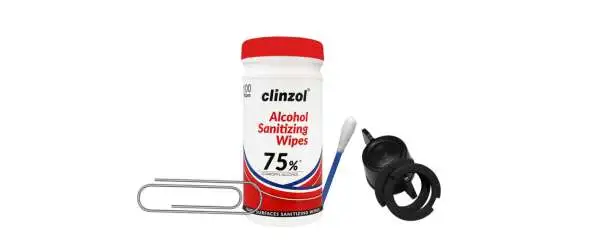
Q-tip: The small cotton tip is perfect for getting into tight spaces and removing dust and debris that can cause stick drift.
Paper Clip or Toothpick: These small, pointed tools are ideal for pressing the tiny reset button inside the controller, which helps recalibrate the analog sticks.
Rubbing Alcohol or Alcohol Wipes: Alcohol is a great cleaning agent because it evaporates quickly and doesn’t leave residue, ensuring that the internal components of your controller remain clean and dry.
Scuf Key (comes with controller): This specialized tool is necessary for removing and reattaching the thumbsticks without damaging the controller.
Now that you have all the necessary materials, let’s walk through the process of fixing stick drift on your Scuf controller. Follow these steps carefully to ensure a thorough cleaning and proper reassembly of your controller.
Preparation
- Turn Off the Controller: Before you begin, make sure your controller is turned off to avoid any accidental inputs or damage.
- Gather Materials: Ensure you have all the materials listed in the previous section within easy reach.
Removing the Thumbsticks
- Locate the Scuf Key: Find the Scuf key that came with your controller. It should be in the original packaging.
- Align the Scuf Key: Insert the Scuf key into the designated slots around the thumbstick. You should see two small notches that align with the key.
- Twist and Remove: Gently twist the key to unlock the thumbstick. You don’t need to apply a lot of force. Once it’s loose, carefully pull the thumbstick out.

Cleaning the Controller
- Prepare the Q-tip: Dip the Q-tip into the rubbing alcohol or wrap it with an alcohol wipe.
- Clean the Analog Stick Mechanism: Insert the Q-tip into the opening where the thumbstick was. Clean around the sensors and the entire cavity, ensuring you remove all dust and debris. Don’t be afraid to apply some pressure to get all the dirt out.
- Clean the Thumbsticks: To clean the stickiness on the thumbsticks, use the alcohol wipe or Q-tip to clean the thumbsticks themselves. Make sure to clean the top, sides, and bottom thoroughly.

Reassembling the Controller
- Reattach the Thumbsticks: Once everything is clean and dry, reinsert the thumbsticks into their slots. Ensure they are properly aligned with the notches.
- Lock the Thumbsticks: Use the Scuf key to twist and lock the thumbsticks back into place. Make sure they are secure and don’t wobble.

Resetting the Controller
- Locate the Reset Button: Look for a small hole on the back of the controller. This is the reset button.
- Use a Paper Clip or Toothpick: Insert the paper clip or toothpick into the hole and press down until you feel a click. This will reset the controller.
- Power On the Controller: Turn the controller back on. This reset process helps recalibrate the analog sticks and clear any software issues.

Final Check
- Test the Controller: Connect your controller to your console or PC and test it out. Move the analog sticks in all directions to ensure there is no more drift.
- Repeat if Necessary: If you still experience stick drift, you might need to repeat the cleaning process or consider replacing worn-out components.
📌Preventive Maintenance
Preventive maintenance is key to ensuring your controller remains in good working condition and free from stick drift. Here are some tips to help you keep your controller in top shape:
Regular Cleaning
- Schedule Regular Cleaning: Make it a habit to clean your controller every few weeks, especially if you use it frequently.
- Use a Soft Cloth: Wipe down the exterior of your controller with a soft cloth to remove dust and fingerprints.
Proper Storage
- Store in a Clean, Dry Place: Avoid leaving your controller in dusty or damp environments. Store it in a clean, dry place when not in use.
- Use a Protective Case: Consider investing in a protective case to keep your controller safe from dust and physical damage.
Gentle Handling
- Avoid Rough Handling: Handle your controller gently to prevent internal damage. Avoid dropping or tossing it.
- Unplug Carefully: When disconnecting your controller, do so carefully to avoid damaging the ports or cables.
Software Updates
- Keep Firmware Updated: Regularly check for firmware updates for your controller and gaming console. Keeping the software up to date can help prevent glitches that cause stick drift.
📌Conclusion
Stick drift can be a frustrating issue, but with the right tools and knowledge, you can fix it and get back to enjoying your games. By understanding the causes of stick drift, using the proper materials for cleaning, and following a detailed step-by-step guide, you can restore your Scuf controller to optimal performance.
Regular maintenance and gentle handling can help prevent stick drift from occurring in the future, ensuring a smooth and enjoyable gaming experience. If you found this guide helpful, consider subscribing to our channel for more tips and tutorials, and don’t hesitate to reach out with any questions.

