

The Oculus Quest 2 has redefined virtual reality with its untethered design and impressive performance. However, to maintain this performance, it’s essential to take care of your controllers, which are integral to your VR experience.
One of the key maintenance tasks is knowing how to replace oculus quest 2 controller battery. This article will provide you with everything you need to know, ensuring your controllers are always ready for action.
Do Oculus Quest 2 controllers run out of battery?
Absolutely. The Oculus Quest 2 controllers are powered by AA batteries, which naturally deplete over time with use. This is why regular battery replacement is crucial to ensure uninterrupted gameplay. Unlike some devices that feature rechargeable built-in batteries, the Quest 2 controllers require manual replacement of the batteries once they are exhausted.
How to Replace Oculus Quest 2 Controller Battery
Replacing the battery in your Oculus Quest 2 controller is a straightforward process, but it’s important to do it correctly to avoid damaging the controller. Follow these steps to ensure a smooth battery replacement.
Step 1: Gather Your Materials
Before you start, make sure you have the following items:
A Fresh AA Battery: Always use a new, fully charged AA battery. Avoid using old or partially drained batteries to ensure optimal performance.

A Small Tool (Optional): While the controller is designed to allow you to remove the battery cover with your thumb, some people find it easier to use a small tool like a flathead screwdriver to gently pry open the cover.
Step 2: Locate the Battery Cover
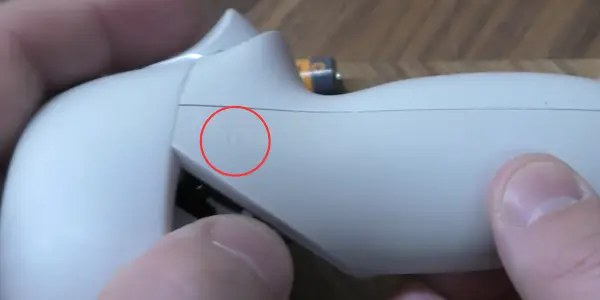
Hold the controller in one hand, with the buttons facing up. The battery compartment is located on the side of the controller, opposite the buttons. You’ll notice a small seam where the battery cover meets the rest of the controller.
Step 3: Remove the Battery Cover
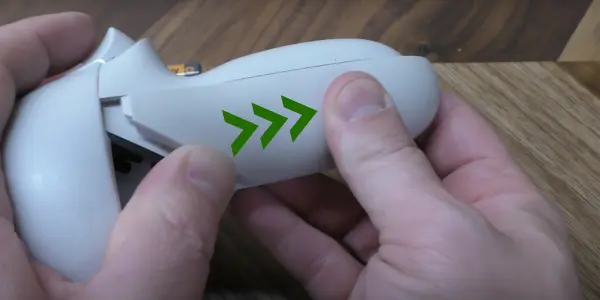
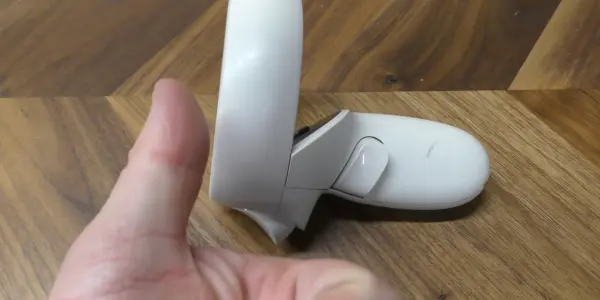
Using your thumb or a small tool, gently push on the battery cover at the seam. Push the cover outward until it pops off. Be careful not to apply too much force, as you don’t want to break the cover or the controller.
Step 4: Remove the Old Battery

Once the cover is off, you’ll see the AA battery inside. Remove the old battery by pulling it out. If the battery is stuck, you can use a small tool to gently lift it out.
Step 5: Insert the New Battery
Take your fresh AA battery and insert it into the compartment, making sure the positive (+) and negative (-) ends are aligned correctly. The positive end should align with the + symbol inside the battery compartment.
Step 6: Replace the Battery Cover
Once the new battery is in place, take the battery cover and line it up with the compartment. Press the cover back into place until it snaps securely. Make sure the cover is flush with the controller and that there are no gaps.
Step 7: Test the Controller
Finally, press the Oculus button on your controller to turn it on. If the controller powers on and connects to your headset, the battery replacement was successful. If not, double-check the battery orientation and make sure the cover is securely in place.
Conclusion
Maintaining your Oculus Quest 2 controllers by regularly replacing the batteries is essential for an optimal VR experience. By following the steps outlined in this guide, you can ensure that your controllers are always ready for action, minimizing disruptions and maximizing your gaming enjoyment.
With the right tools, knowledge, and a bit of preparation, replacing your Oculus Quest 2 controller battery is a simple task that will keep your VR sessions running smoothly. Remember to monitor your battery levels, choose the right type of batteries, and follow best practices to extend the life of your controllers.